
Download specific map areas to use TouchTrails even without an internet connection.
Create a New Region
Go to the Offline Maps tab and tap the “+” button to create a new offline region.

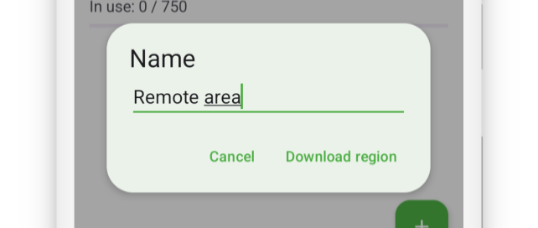
Give the Region a Name
Enter a meaningful name for your offline region, then select “Download region.”
Select the Download Area
You will see a map with a highlighted rectangle showing the current download area.
You can adjust this area freely by dragging the corners, edges, or the center of the rectangle.
Choose the Map Style
Offline regions are downloaded for one specific map style only.
Make sure the desired map style is selected before starting the download.
Tile Pack Count
At the bottom of the screen, a panel shows how many tile packs are required for your selected area.
The total number of unique tile packs across all offline regions must remain below 750 (see Limits).

Set the Maximum Zoom Level
In the same panel, you can choose the maximum zoom level for the offline region.
Higher zoom levels increase the amount of data required.
When you’re ready, tap “Download” to begin downloading the offline region.